
How to Board a Loft: A Step-by-Step Guide
- Mar 12, 2020
- 4 min read
Updated: May 15, 2023

If your home comes with a loft, this is great news for you. Not only can it be used for occasional storage, you can even create an ultra organised walk through storage space to ensure your living areas are clutter free. All-in-all, maximising your loft space is a great way to add value to your home.
If it's just an empty space right now, find out how to board a loft and make it functional in this blog...
The Benefits of Boarding a Loft
Loft boarding is actually a pretty simple process -- this means it's easy to DIY and you don't need to splash extra cash on hiring an expert.
So, what are the benefits of boarding your loft?
Drastically increase your home's storage space
Declutter your home by storing more in your loft
Make your loft safe and easy to move around in
Reduce heat loss from your home by maintaining the correct levels of insulation
Reduce your home's overall energy consumption by preventing heat loss
Loft boards and the tools you need for the job are easy to come by. But working within the confines of your loft space can be tricky. Here are a few simple steps to make the process easier...
How to Board a Loft in 6 Simple Steps
When it comes to loft boarding, you do need the right tools and materials for the job in order to build a solid and functional space, so with this in mind:
1. Get the Right Tools and Materials For the Job
As with any major DIY project around the house, you should always wear adequate PPE - personal protective equipment. This generally includes overalls, heavy-duty gloves, a dust mask, and closed shoes.

A few extras that should come in handy include a tape measure, an electric screwdriver and a pencil. Do yourself a favour before you start the job by setting up a temporary work surface using a spare board across the ceiling joists.
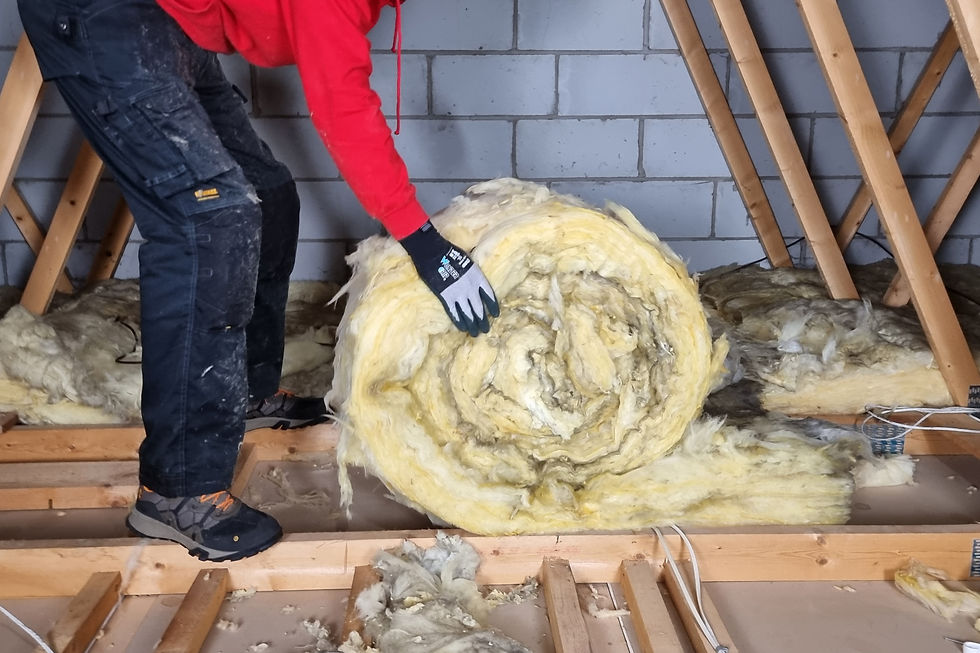
2. Assess and Update the Current Insulation
In order for all your loft boarding efforts to be truly worthwhile, it's important to assess the current state of insulation. Before you get into laying loft boards, check the current depth of insulation. The government recommended depth is 270mm. Any less than this and your insulation could be ineffective. If your insulation is not up-to-scratch, it's important to think about updating it first, before laying your loft boards.
Try and avoid squashing down your insulation too when laying loft boards. This can drastically reduce its effectiveness, too. Ultimately, this leads to heat and energy loss throughout your home.
3. Fully Measure Your Loft Area

This is a super important step to ensure you order the right amount of materials for boarding your loft. It's a simple measurement: you just need to multiply the width of the loft by the length. Don't forget to measure the distance between loft joists and trusses, too.With these measurements, you should be able to calculate how many loft boards you'll need to cover the space. Most loft boards come in two sizes: 1200mm x 320mm and 2400mm x 600mm.
4. Elevate Your Loft Boards

As we mentioned earlier, the last thing you want is to squash down the insulation in your loft. This can reduce its thermal efficiency by over 50%! So, if your insulation lies above your joist, you'll need to elevate your loft boards so they don't compress the insulation.
Most loft boards will be sold alongside Loft Leg products that keep the boards elevated above your insulation. These Loft Leg supports must be attached to ceiling joists or roof trusses and are installed in a grid. Bear in mind that this spacing of the legs depends on your ceiling joists and trusses, as well as the size of the boards you're using.
The insulation can then be rolled out around the Loft Leg grid.
5. Lay Out Your Loft Boards

The next step is to lay out your loft boards across your Loft Legs. Simply place the chipboard on top of the Loft Legs and secure into position by screwing through the board directly into the top platform of the Loft Leg.

Try to lay out your loft boards in a staggered pattern. This is important because you don't want the joints in all your loft boards to meet up as this could compromise its structure. The best screws for the job include 4mm x 30mm countersunk multi-purpose screws.

Do a once-over of all the tongue and groove connections too, ensuring they're flush with one another.
6. Fill in the Gaps Where Necessary
If you are staggering the loft boards you will need to cut some boards to fit. Simply mark the loft boards with a pencil and using a timber saw carefully cut to size. Ensure the loft boards are supported on Loft Legs at all four corners and along their length at no greater than 600mm centres. Once in positional secure them with screws.
Find Loft Boarding Accessories and More

Now that you know the basics of how to board a loft, get all the right materials for the job with Loft Leg.
We not only supply Loft Legs, but other clever loft storage products such as loft lighting, loft shelving, storage solutions, and more. Browse our range of products, here...


Comments