
How to Board Your Loft in 4 Easy Steps
- Jan 20, 2025
- 7 min read
Updated: Nov 19, 2025

Boarding your loft can greatly enhance your home by providing additional storage space as well as improving access to equipment that is located in the loft. A correctly boarded loft will also prevent damage to your insulation, ensuring it isn't compressed and is always performing at 100% efficiency.
Moreover, most loft boarding jobs can be done with basic DIY skills, are relatively inexpensive and can easily be done over a weekend.
So whether you are a seasoned DIYer or a first-time loft-boarder this guide will walk you through how to board your loft in four easy steps, from planning and preparation to securing the boards in place. By the end, you'll have a neat, safe and accessible loft storage area.
1. Getting Yourself Prepared
Before you start laying boards, its important to plan the space and ensure the loft is suitable for boarding. This involves going into the loft space and working out where the loft boards will be located. This step involves measuring the area to be boarded, measuring the centre-to-centre distances on your joists/trusses and checking your loft is structurally sound.
Next, you will need to make sure you’ve got everything you need for the project. Your PPE - personal protective equipment - is by far the most important of these.
You’ll need:
* Hooded disposable overalls
* Gloves
* Eye protection
* A dust mask
* A tape measure
* Pencil
* Electric Screwdriver fitted with a magnetic bit
* Saw
If you can, we’d also recommend setting up a temporary work platform using a flat piece of board across the ceiling joists. It’s safer, more stable and often more comfortable to work from one rather than precariously balancing on joists or trusses.
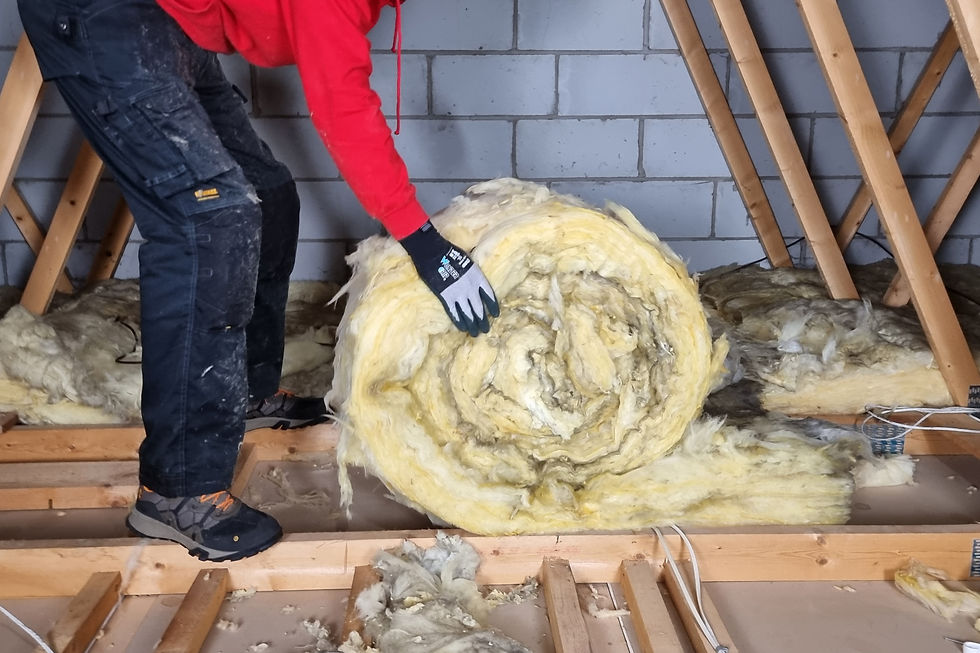
2. Assess The Current Insulation and Ventilation
This is one of the most important steps, and it’s one that’s tripped up a lot of homeowners in the past. Before you start to lay any boards, check the depth of your insulation. For it to be thermally effective, mineral wool insulation needs to be at the government recommended depth of 270mm.

This is generally made up of 100mm of insulation between the joists/trusses, and a 170mm top up layer running perpendicular to the joists. We went into full details in a previous post about loft insulation, but in short: squashing it down can reduce its effectiveness by up to 50%, which translates into significant losses for you in terms of heating bills and wasted energy.


Check that there is sufficient ventilation in the loft space and that any existing insulation is not blocking the eaves/soffit vents. Blocked vents or insufficiently ventilated lofts can develop issues further down the line so its best to make sure this is checked and remedied before undertaking any work in the loft.
3. Estimating / Measuring / Purchasing
With your measurements to hand you will need to work out how many loft boards and Loft Legs you will need for the job.
An important decision at this stage is on the size of loft boards you will use. Loft boards are typically 18mm and are supplied in two sizes:
1200mm x 320mm - these typically come in packs of three, and cover 1.17 square metres per pack (easy to get through small loft hatches and transport from the DIY store)
2400mm x 600mm - this size of board is sold in individual sheets and covers 1.44 square metres each (much more efficient but requires a large loft hatch and sufficient head room to get into the loft space. These boards can also be tricky getting to the house from the DIY store)
Once you have decided on the size of boards you will use you can calculate how many loft boards you will need to create your storage area.
Once you know the number of boards you will be using you can subsequently work out how many Loft Legs you will need to raise the boards.
The “How many do I need?” section of the Loft Leg page has a handy calculator that will help you to work out the number of Loft Legs you’ll need.
Loft Legs are fitted in a grid , the dimensions of the grid will depend on the spacing of your ceiling joists or trusses and the size of the boards you are using.
Using the online calculator on www.loftleg.com/loftleg simply select the board size you are intending to use.

Then using your joist spacing information, and the number of sheets/approximate area work out how many boxes of legs you need.

Clicking on the red “View pdf” button will reveal a floor plan of how to lay the boards and legs.

Loft boards generally have a tongue and groove construction which allows them to neatly slot together. Be carefully to not damage the edges as this will prevent the boards fitting correctly up to each other.

If required, pick up the top up insulation rolls and screws at the same time. The best screws to use are 4mmx30mm countersunk multi-purpose screws. We have specific recommended screws on our web-site. You will need approximately 6 screws for each Loft Leg you are fitting. 4 screws to secure the base of the Loft Leg to the joist/truss and additional screws to secure the chipboard to the top platform of the Loft Leg.
Insulation is supplied in rolls and is readily available from DIY stores and builders merchants.
4. Installing
Before laying down boards, as previously mentioned, its good practice to double check that the ventilation in the loft is OK. Ensure that any eaves ventilation is left unobstructed.
If you already have two layers of insulation in your loft you will have to roll back the top layer to the sides of the loft to reveal the joists/trusses before fitting Loft Legs.
Loft Legs are screwed directly into the joists or trusses in a grid to raise the boards. The exact dimensions of the grid will depend on the joist/truss centres and the width of the boards. The maximum distance between Loft Legs should be no more than 600mm centre-to-centre. A long straight edge or string line will help to position the first row of Loft Legs correctly.
It is highly recommended that the screws are pre-loaded into the base of the Loft Legs before taking them into the loft. This saves loads of time and lost screws when it comes to securing them to the timbers.
Remember that chipboard sheets ‘share’ the top platform of the Leg as you can see in the following photo. In some cases, up to 4 chipboard sheets will meet on one Loft Leg.

Once all the legs are in place the top up layer can be rolled back into the correct position. Wherever the insulation meets the top platform of a Loft Leg create a small slit in the quilt with a Stanley knife and push the insulation gently down around the Loft Leg to form a snug fit.
The loft boards should be installed perpendicular to the joists or trusses. Lay the first board down and secure in place along the back edge. The front edge cannot be fixed until the next board is in place. A screw driven through the chipboard will self-tap into the top platform of the Loft Leg securely holding the board in place.
Continue laying and securing the remaining boards as you work across the loft.
Some boards may require cutting to a specific size, simply mark out the required cut with a pencil and using a saw cut to the required width or length. When cutting boards care should be taken to maintain the tongue and groove features wherever possible as these add strength to the finish platform.
Remember to always prioritise safety by using the correct equipment, taking care when using power tools and wearing personal protective gear. With the right preparation and tools, loft boarding is a straightforward DIY project that can add significant value to your home.
The end result is a useful loft storage space while maintaining a comfortable, warm, energy efficient house.

I Have A New Build Home With Even Deeper Insulation - What Do I Do?
If you own a new build home and your insulation is deeper than 270mm then don't worry. The above process is exactly the same but instead of using Loft Legs, you can use Loft Leg XLs. Loft Leg XLs are 300mm tall allowing you to board over 400mm of insulation. A specific blog on creating storage in new build homes can be found here.
For more detailed information and to see the process step by step you can watch the full process below:
Recent research suggests that only 1 in 10 of UK homes get the full benefit of their loft insulation, so when you’re undertaking the project it’s worth giving your insulation some careful attention too. We’ve designed our Loft Leg products to help you make sure your home is in that top 10%.
I Don't Think My DIY Skills Are Sufficient, What Are My Options?
If, having read the above, you don't think this is a job for you and your DIY skills then Loft Leg can recommend a professional installer in an area near you. A list of Loft Leg recommended professional installers can be found by clicking here, where you will see there are installers covering all parts of England, Scotland and Wales.
Conclusion - How To Board a Loft In 4 Easy Steps
Boarding your loft in four easy steps -- planning, assessing, purchasing and installing -- will transform your unused attic space into a valuable storage area. By following this guide you'll ensure the job is done safely and efficiently, with a finished result that will serve you for many years to come. Happy boarding!
Loft Leg also manufacture truss shelving kits, downlight covers and Loft Lighting products to finish the job in style.

Find out more about Loft Leg here, or feel free to give us a call on 01282 861001.


If the joists are 600mm apart why are the boards commonly sold in 1220 lengths?
this is latest standard loft boarding system. we normally use 175mm legs for traditional properties and 300mm for new builds. https://loftboardingspecialist.org.uk/loft-boarding/